 |
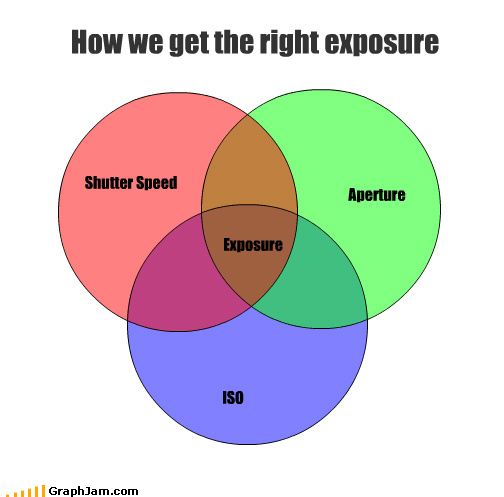
| Venn Diagram for Exposure |
There are only 3 things to adjust on a camera that help you get the right exposure. This is just a review of those because we're about to head into flash photography and we need to lay some foundation.
On all of your camera's (except Mr. Nikon Guy, Drew) you should be able to see the following, and I've labeled each so we can talk about them individually:
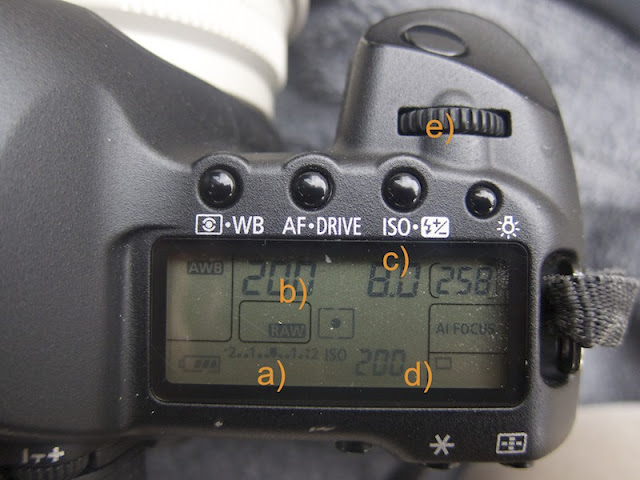 |
| Top Display of the Canon EOS digital SLR. |
If your camera is on, and you don't see this display, hit the shutter release button (SRB) just in front of label (e) on this photo. It will prompt this display and the MOST important thing you're looking for is the Exposure Meter, marked (a) on the display. If you look through the viewfinder and hit the SRB, there will be an amber color similar to this display. And also, on some newer camera, you can see it on the back display like this:
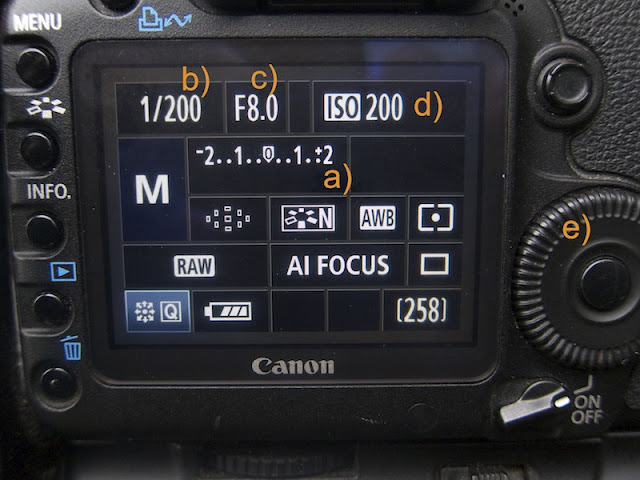 |
| Back Display of a Canon EOS digital SLR |
What this display tells us is how the camera is viewed the scene that it currently sees through the lens. If placed in Manual Mode, there will be an indicator that moves around from left to right on the this Meter. This meter tells us what the camera thinks about the lightness or darkness of the scene it is looking at. Essentially, if the indicator bar beneath this meter sits right in the middle (0 eV) it means that with the currently chosen Shutter Speed and Aperture and ISO, the camera is calculating the lightness of the scene as equivalent of 18% gray.
Now what does that look like? Here is a Photoshop rendition:
 | |
| White, 18% Gray, Black |
In other words, if you were to photograph the scene that the camera is looking it, it would have the lightness or darkness, or EXPOSURE, equivalent to the value of gray (18%) shown. In fact, there are professional cards that are used for checking this:

The photographer faces the camera towards this card, and adjusts their Shutter Speed, Aperture, ISO until the Exposure Meter shows the indicator right in the middle. Just to let you know about the other two (the white and black) on the Photoshop rendition, the black is about 2/3 stop darker, and the white is 1 + 2/3 stops lighter than the gray (according to the meter on my S90). This may be different when you purchase a calibrated card like the one shown above.
Now back to exposure. How do we choose each setting? Each facet has advantages and disadvantages for choosing the right speed, aperture, ISO. I placed a letter by where you will find the reading on your individual cameras (Stephanie, ask Daniel if you can't find it, your camera has the least of everyone on this list). Each setting is dealt with here in relation to what it does, and how it affects exposure, and why it would be chosen for adjustment.
b) SHUTTER SPEED - Time that the focal plane shutter in your DSLR stays open (in seconds)
Slower Shutter Speed (<1/15 sec) - Lets more light in. Blurs motion. USED FOR: those cool City / Traffic pictures of the highways or streets where all the lights make a path of light. Or lightning shots.
Faster Shutter Speeds (>1/60 sec) - Lets less light in. Freezes motion / makes picture more clear, even if your hand shakes. USED FOR: Sports, portraits, events like parties.
c) APERTURE -Opening of the iris inside the lens.
Lower Aperture (f number, e.g. 2.8 or better) - more light let in, better bokeh, less of the picture in focus, Usually PREFERRED for portraits.
Higher Aperture (e.g. 16 or smaller) - less light let in, more of the picture in focus. Usually PREFERRED for landscape.
d) ISO - Sensor's sensitivity to light.
Lower ISO, less sensitive, more clear. USED FOR: Fashion, Portraits, any photo that needs high clarity.
Higher ISO, more grainy (not smooth picture), more sensitive to light, USED FOR: no flash photography, weddings, parties, edgy artsy treatment of the shot
So when you point your camera (without the lens cap on, I have to remind us because the meter will work with the lens cap on) to the picture you want to take, you have to adjust one or all three of those things.
PRACTICAL APPLICATION:
I choose those settings for the best quality of picture I can afford (for the light available). Here is an example:
Let's say we're going to be spending Sabbath afternoon shooting at Morse Mt. Before I pick up the camera, I know 2 things.
1) It's light outside on Sabbath afternoon. I'm choosing a lower ISO for clear shots of people. It's fall so I'll probably choose 200 (I don't want artsy photos with a lot of grain, and there'll be enough light)
2) There are people, so I'll probably want a low aperture (f4 sounds about right for single person shots, I want a good bokeh).
So now I set those two things on my camera. And then keep my finger on the shutter dial (e) and when I bring my camera to my eye, I hit the SRB half way to have the camera meter the shot, it shows me the Exposure reading. And I adjust my Shutter Speed so that my reading is what I want:
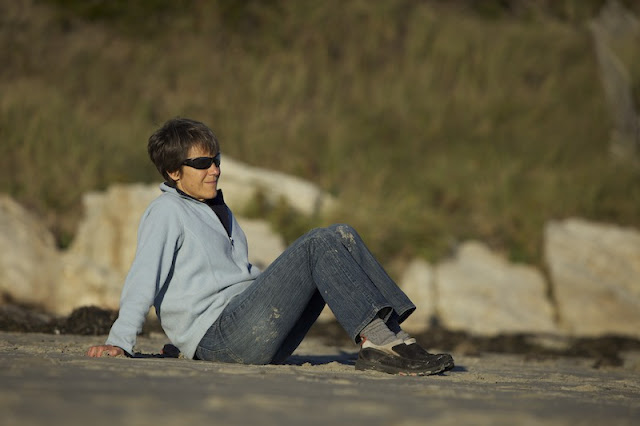 |
| ISO 200 f4 1/4000 sec |
Go through the thought process SLOW before each shot, and it will become more automatic. Remember: Slow is smooth, and smooth is fast.
You might be confused about the phrase 'when my exposure reading is what I want.' Most of the time, what I WANT is right in the middle of the meter (see the photo again). Next time we'll talk more about the exposure meter, when do you want it underexposed (stopped down) or overexposed (stopped up).
Any questions?
No comments:
Post a Comment