 |
| Meter off the sky, not the lighthouse. |
So I am happy to review exposure whenever we get a chance.
Here is my thought process of shooting in Manual in order:
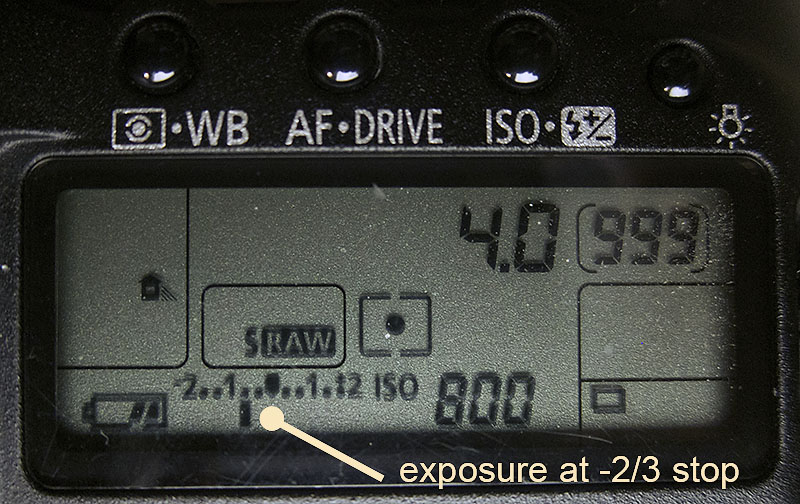
1) Before anything else, I knew we were outside, but I also knew that the light was starting to get darker because of sunset: ISO 800
2) I thought I'd be taking more portraits, so I wanted good bokeh (background blur): Aperture 4.0
3) As I walk around I see the light on the Lighthouse. I aim the camera at the sky, not the lighthouse, and then adjust the shutter speed (faster=higher number, less light) until my meter reading shows:
 |
| Negative 2/3rds of a complete stop. |
4) Once the shutter speed has been set, I readjust the camera to obtain the framed shot above. At this point, I'm done choosing exposure so I know longer care that the camera is reading light off the lighthouse.
5) Squeeze the trigger.
Remember that as the light gets less, the shutter speed will actually drop, you have to keep changing the shutter speed to get the nice blue (-2/3 stop).
Remember, 1 full stop is the unit that we measure the light that is let into the camera by the lens. We are letting 2/3rds of a complete unit of light (2/3rds of 1 stop of light) into the sensor. We adjust this primarily by the shutter speed (since the aperture and the ISO were already chosen using other criteria).
Hope that helps!
No comments:
Post a Comment